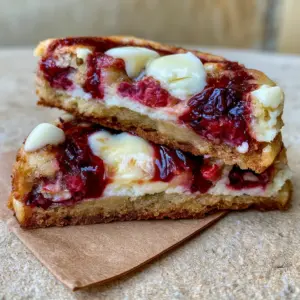
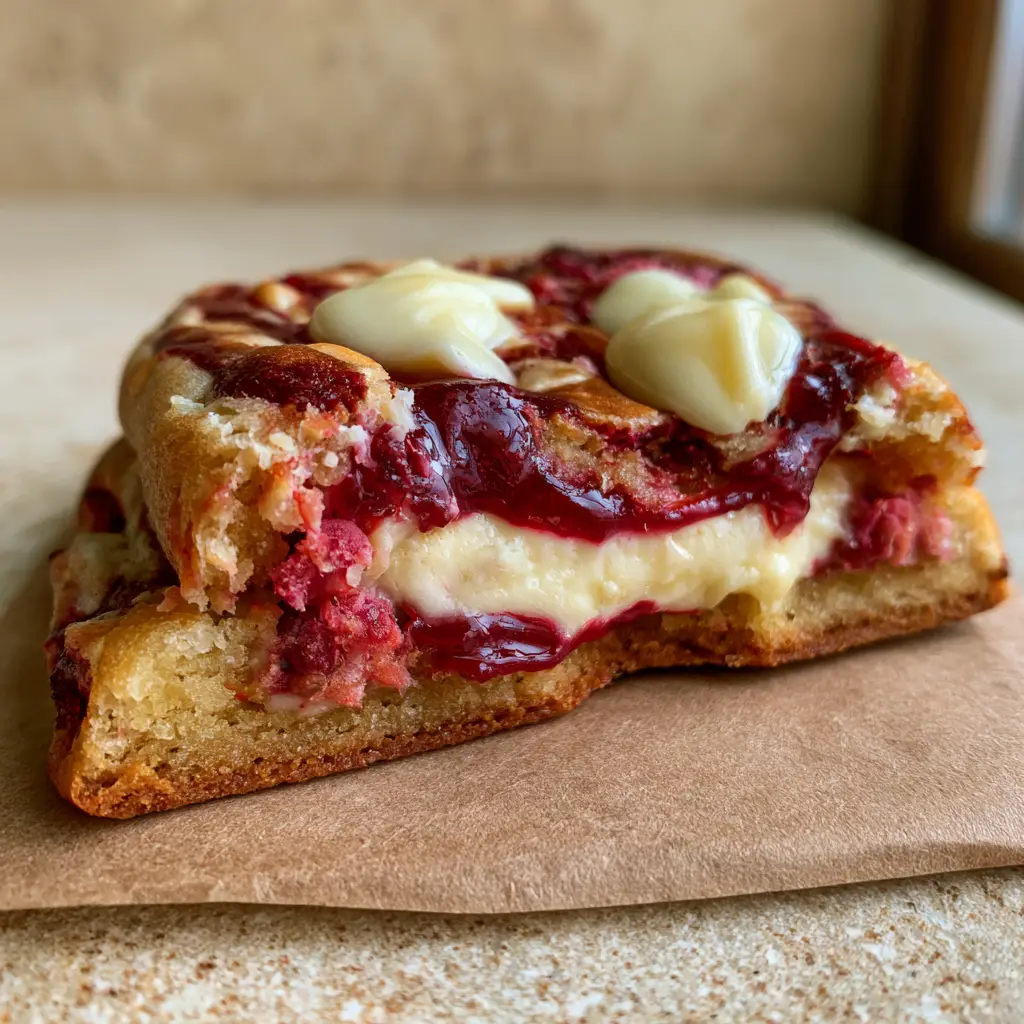
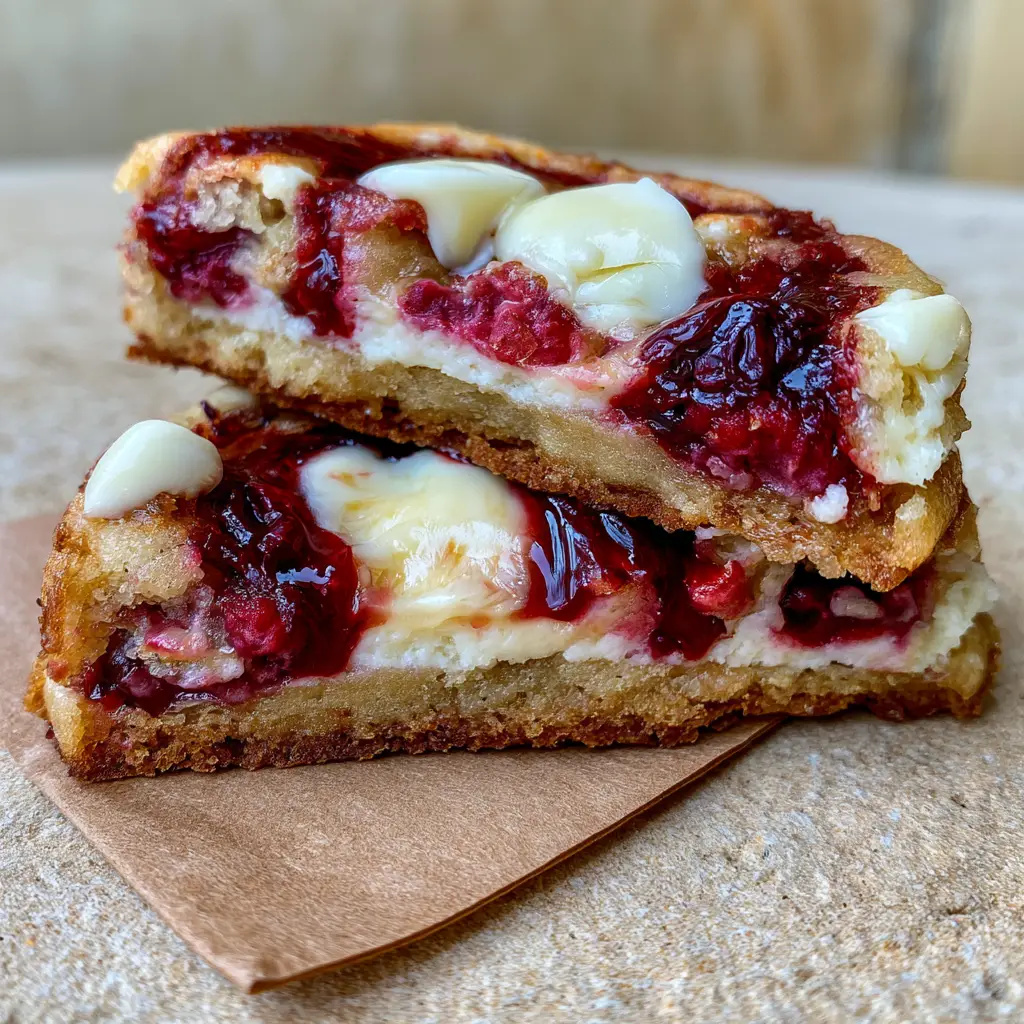
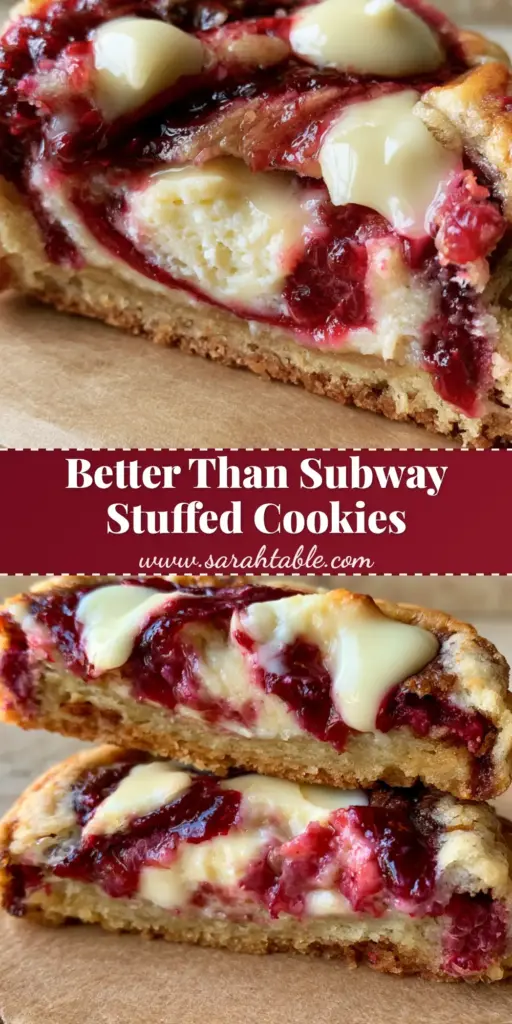
There is a specific kind of magic that happens when you break open a warm, soft-baked white chocolate raspberry cheesecake cookies. You are first met with the resistence of a thick, chewy golden-brown crust, followed immediately by the sight of a perfectly intact, molten-white cheesecake filling.
The visual contrast is stunning: ribbons of thick, glossy deep-crimson raspberry jam swirl through the dough, punctuated by soft, jammy baked raspberry pieces and glistening pools of melted white chocolate. This isn’t just a cookie; it is a multi-layered dessert experience that rivals any high-end boutique bakery.
In this guide, we are diving deep into the culinary science of the “stuffed” cookie to ensure your results look exactly like the rustic, handheld masterpiece resting on brown parchment paper in our photos. Whether you are looking for a weekend project or a show-stopping addition to your holiday spread, these cookies deliver on every sensory promise.
Why These White Chocolate Raspberry Cheesecake Cookies Outshine the Rest
- The Molten Architecture: Unlike other recipes where the filling evaporates, our method ensures a thick, creamy cheesecake center that stays molten even after cooling.
- Texture Contrast: You get crispy, caramelized cookie edges paired with a center so soft it melts on the tongue, creating a professional mouthfeel.
- Visual Vibrancy: By using both fresh raspberries and a concentrated jam swirl, we achieve those deep-crimson ribbons that pop against the golden dough.
- Balanced Sweetness: The tartness of the raspberries and the tang of the cream cheese perfectly cut through the rich, buttery white chocolate pools.
If you love the decadence of a stuffed treat, you might also want to try our cinnamon roll cheesecake cookies for a warm, spiced variation of this technique. For those looking for lighter options after a rich dessert, check out our diabetic desserts collection.
Foundational Ingredients for the Perfect Stuffed Texture
To achieve the specific “soft-baked” look and structural integrity required for these white chocolate raspberry cheesecake cookies, every ingredient serves a forensic purpose. We aren’t just mixing dough; we are building a vessel for molten cream cheese.
Unsalted Butter (1 cup / 226g): We use softened butter to create a sturdy emulsion. This provides the fat needed for those crispy caramelized edges described in the visual blueprint.
Brown Sugar (1 cup / 200g) & Granulated Sugar (1/2 cup / 100g): The high ratio of brown sugar is the secret to the chewy, golden-brown cookie dough. It adds moisture and a hint of molasses that complements the white chocolate.
Full-Fat Cream Cheese (8 oz / 225g): This is the heart of the “molten white cheesecake filling.” Using full-fat is non-negotiable for that thick, glossy texture that doesn’t leak during the bake.
Fresh Raspberries (1 cup / 125g): These provide the “soft-baked raspberry pieces.” We fold them in last to ensure they stay somewhat intact rather than turning the whole dough purple.
White Chocolate Chunks (1.5 cups / 255g): Opt for high-quality bars chopped into pieces rather than just chips. This creates the “large glistening pools” seen in the handheld photo.
Raspberry Preserves (1/4 cup / 80g): This is used to create the “deep-crimson raspberry jam” swirls. It provides a concentrated flavor that fresh berries alone cannot achieve.
Cornstarch (1 tsp / 3g): A professional baker’s secret. It softens the flour’s proteins, ensuring the cookie remains “soft-baked” and tender for days.
Essential Equipment for Bakery-Quality Results
To replicate the rustic, handheld photo, you need the right tools to handle the delicate dough. A standard cookie scoop is essential for maintaining a “thick, perfectly intact” center without leakage.
You will also need rustic brown parchment paper. Not only does this prevent the caramelized edges from sticking, but it also provides the aesthetic background seen in the visual prompt. A heavy-duty baking sheet ensures even heat distribution so the bottoms don’t burn before the cream cheese is set.
Finally, a handheld or stand mixer is required to properly aerate the butter and sugars. This aeration creates the tiny air pockets that allow the white chocolate to form those deep “pools” as it melts into the dough.
Step-by-Step Mastery: Building the Layered Cookie
Phase 1: Engineering the Molten Cheesecake Core
Start by whipping the cream cheese with 1/4 cup (30g) of powdered sugar until completely smooth. You want a texture that is pipeable but firm. Scoop small teaspoons of the mixture onto a tray and freeze them for at least 30 minutes.
This freezing step is the most critical culinary logic in the recipe. If the cheesecake center is room temperature when it hits the oven, it will liquefy and leak. Freezing ensures the dough sets around the filling before the filling reaches a melting point.
Phase 2: Crafting the Golden-Brown Dough
Cream your butter and sugars for at least 3 minutes. Look for a visual cue: the mixture should turn from a dark sandy brown to a pale, fluffy tan. Beat in the egg and vanilla until the volume increases slightly.
Sift your dry ingredients (flour, cornstarch, baking soda, salt) into the wet mixture. Mix until just combined. Over-mixing at this stage will develop gluten, turning your “soft-baked” cookie into a tough, bread-like disk. We want a tender crumb that gives way easily when broken in half.
Phase 3: The Fold and the Swirl
Gently fold in the white chocolate chunks and the fresh raspberries. Be careful not to crush the berries; you want “jammy baked raspberry pieces,” not a pink dough. Finally, drop small dollops of the raspberry jam onto the dough and give it one very brief swirl with a knife.
To assemble, take a large scoop of dough, flatten it in your palm, place a frozen cheesecake puck in the center, and wrap the dough around it. Ensure there are no cracks. Any gap in the dough will result in the filling leaking out, ruining the “completely sealed” visual we are aiming for.
Phase 4: The Bake and Sensory Cues
Place the cookies on the brown parchment paper and bake at 350°F (175°C). Watch for the visual changes: the edges will turn a deep, crispy golden-brown while the centers remain pale and slightly puffed. The white chocolate should be glistening in molten pools on the surface.
Let them rest on the baking sheet for at least 10 minutes. This “carry-over cooking” is essential for the cheesecake center to set into its final molten-but-stable state. If you move them too soon, the structural integrity of the soft-baked dough will fail.
Expert Tips for Visual and Flavor Success
- The “Slam” Technique: Halfway through baking, gently tap the pan against the oven rack. This ripples the dough, creating more surface area for the white chocolate pools to settle into.
- Avoid Berry Bleeding: If using frozen raspberries, do not thaw them. Fold them in frozen to keep the deep-crimson ribbons distinct from the golden dough.
- Perfect Sealing: Use slightly damp hands to seal the dough balls. This helps the edges of the dough fuse together, preventing cheesecake leakage.
- Quality Chocolate: Use a white chocolate bar with at least 20% cocoa butter. Cheap “white chips” often contain no cocoa butter and won’t form the “glossy pools” seen in the prompt.
If you enjoy the process of crafting intricate desserts, you might also enjoy making paleo lemon bars for a citrusy alternative. For a savory palate cleanser after these sweet cookies, try our creamy Calabrian chili pappardelle.
How to Store and Reheat Your Stuffed Cookies
Because these white chocolate raspberry cheesecake cookies contain a dairy-based filling, they require more care than a standard chocolate chip cookie. Store them in an airtight container in the refrigerator for up to 5 days.
To recapture that “warm, soft-baked” handheld experience, reheat a single cookie in the microwave for 10-15 seconds. This will re-melt the white chocolate and return the cheesecake center to its molten state. You can also freeze the unbaked stuffed dough balls for up to 3 months—just add 2 minutes to the baking time.
Pairing Suggestions for a Complete Experience
These cookies are incredibly rich, making them the perfect finale to a light, balanced meal. We recommend serving them after a fresh lunch recipes for moms style salad or a protein-heavy dish like our teriyaki chicken recipe.
The tartness of the raspberries also pairs beautifully with a creamy pasta. Consider serving these as a dessert following our tomato pasta sauce with cream cheese, which echoes the creamy notes found in the cookie’s center.
Common Questions About Stuffed Raspberry Cookies
Yes, you can use frozen raspberries. Do not thaw them before folding into the dough; this helps maintain the ‘jammy baked’ pieces without staining the entire dough purple.
Yes, because of the real cream cheese center, these cookies should be stored in an airtight container in the refrigerator. They stay fresh for up to 5 days.
Use a high-quality white chocolate bar chopped into large chunks rather than standard chips. Press a few extra chunks into the top of the dough balls immediately before baking.
The secret is two-fold: freeze the cream cheese mounds until solid before stuffing, and ensure the cookie dough is wrapped completely around the filling with no visible cracks or thin spots.
This usually happens if the butter was too warm or the dough wasn’t chilled. Ensure your butter is softened but still cool to the touch, and don’t skip the cornstarch which helps with structural integrity.
The Definitive White Chocolate Raspberry Cheesecake Cookie Recipe
White Chocolate Raspberry Cheesecake Cookies: The Ultimate Bakery-Style Recipe
Ingredients
Equipment
Method
- Beat cream cheese and powdered sugar until smooth. Scoop 12 teaspoon-sized mounds onto a parchment-lined tray.
- Freeze the mounds for at least 30 minutes until solid. This prevents the filling from leaking during baking.
- In a stand mixer, cream butter, brown sugar, and granulated sugar for 3-5 minutes until light and fluffy.
- Mix in the egg and vanilla extract until well combined.
- Gradually add flour, cornstarch, baking soda, and salt. Mix on low until just a few streaks of flour remain.
- Gently fold in white chocolate chunks and fresh raspberries. Add dollops of jam and swirl once.
- Flatten a large ball of dough, place a frozen cream cheese puck in the center, and seal tightly. Ensure there are no cracks.
- Bake at 350°F (175°C) for 12-15 minutes until edges are golden-brown and white chocolate pools appear. The centers should still be soft.
Notes
Use high-quality white chocolate bars for the best melting 'pools'.
Do not over-mix once the flour is added to maintain a soft-baked texture.
Closing & Call to Action
Mastering the white chocolate raspberry cheesecake cookies is a badge of honor for any home baker. The combination of the molten white center, the deep-crimson jam, and the golden-brown caramelized edges creates a dessert that is as beautiful to look at as it is to eat.
We would love to see your creations! Did your white chocolate form those perfect glistening pools? Tag us on social media or save this recipe to your favorite board on Pinterest so you never lose this bakery-style secret. Happy baking!