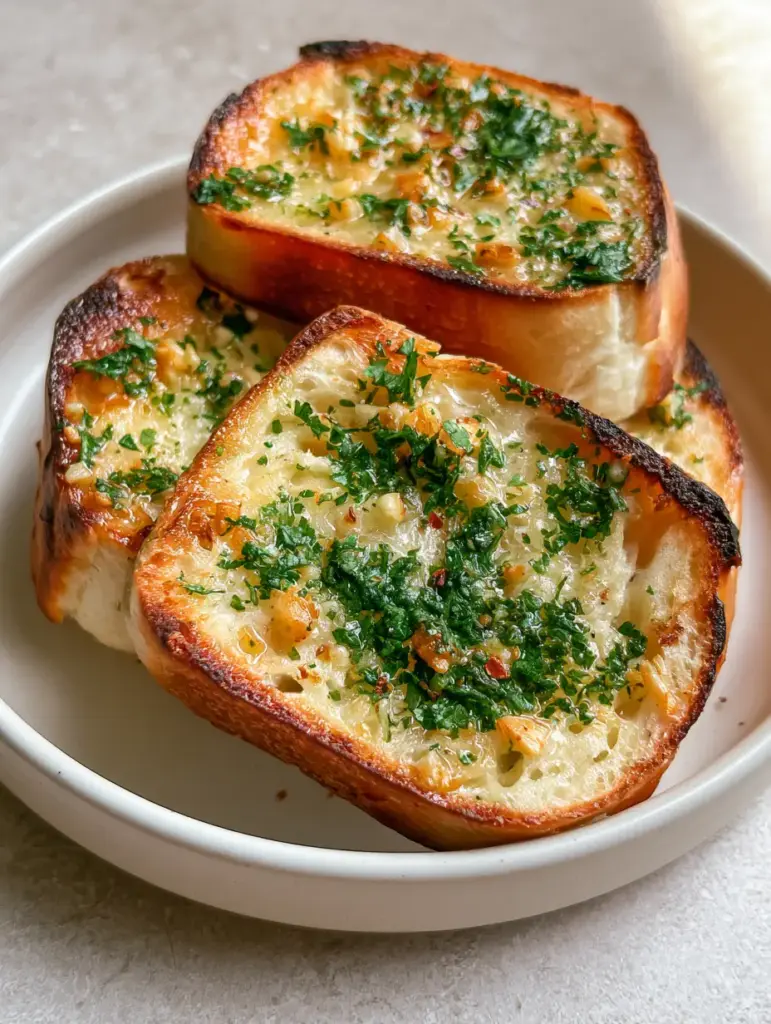
There is something inherently comforting about the sight of thick, pillowy slices of Greek yogurt garlic bread stacked high on a ceramic plate. Imagine a bread that defies the laws of standard quick-breads, offering a soft, airy, and incredibly fluffy crumb that mimics a traditional sourdough but with a fraction of the effort. This recipe is designed to bridge the gap between a high-protein dough and the decadent, buttery indulgence of a classic steakhouse side.
When you pull these slices apart, you aren’t just met with steam; you are greeted by the intoxicating aroma of toasted golden minced garlic and the brightness of fresh parsley. The natural morning light hitting the glistening layer of melted salted butter reveals a texture that is both tender on the inside and boastfully charred on the outside. This is not just a side dish; it is a culinary experience designed for those who appreciate the finer details of a perfect crust and a seasoned finish.
Whether you are looking to elevate your weekend brunch or seeking the perfect companion for a hearty bowl of creamy tomato pasta, this bread delivers on every sensory promise. From the audible crunch of the golden-brown crust to the subtle heat of crushed red pepper flakes, every bite is a balanced masterpiece of fat, acid, and salt.
Why This Fluffy Yogurt Dough Will Change Your Baking Game
- The Protein-Powered Crumb: Unlike standard dough, the inclusion of Greek yogurt creates a biological reaction with the leavening agents, resulting in a protein-rich, ultra-soft interior that stays moist for days.
- The Forensic Crust: We utilize a high-heat bake to achieve that specific toasted golden-brown charred crust that looks professional and tastes even better.
- Depth of Flavor: Instead of raw garlic, we focus on minced roasted garlic bits that provide a mellow, nutty sweetness without the harsh bite.
- Visual Aesthetics: The contrast of bright green parsley, red pepper flakes, and translucent melted butter makes this a centerpiece-worthy dish for any table.
The Anatomy of Perfect Greek Yogurt Garlic Bread
To achieve the exact visual and textural results seen in our professional photography, we must look at the science of our ingredients. Every component serves a specific purpose, from structural integrity to flavor enhancement. This isn’t a “diet” bread; it’s a gourmet bread that happens to use smarter ingredients.
Full-Fat Greek Yogurt: You must use plain, full-fat (5% or higher) Greek yogurt. The acidity tenderizes the gluten, while the fat provides the richness needed for that “handheld smartphone photo” glistening finish. It acts as a natural conditioner for the Greek yogurt garlic bread dough.
All-Purpose Flour: This provides the necessary protein structure. While you might be tempted by bread flour, all-purpose keeps the crumb tender and “airy” rather than chewy or tough. We recommend weighing your flour to ensure the dough isn’t too dense.
Active Dry Yeast & Baking Powder: We use a dual-leavening approach. The yeast provides the deep fermented flavor and “airy” bubbles, while the baking powder ensures a reliable rise, making the bread look stacked and casual on the plate.
Salted Butter Glaze: A high-quality salted butter is non-negotiable. When melted, the salt helps carry the garlic flavors deep into the pores of the toasted bread, creating that authentic, unedited look of pure indulgence.
Fresh Garlic: We use fresh cloves, minced finely. By roasting them briefly in the butter before glazing, we achieve those tiny pieces of toasted golden minced garlic that sit beautifully on the surface.
Fresh Parsley and Red Pepper: The parsley must be “bright green” and “finely chopped” to provide the visual pop against the golden crust. The red pepper flakes add a “subtle” heat that cuts through the richness of the butter.
Essential Tools for a Professional Charred Crust
To recreate the soft shadows and authentic texture of our Greek yogurt garlic bread, you need the right environment. A heavy-duty baking stone or a cast-iron sheet pan is ideal. These materials hold heat effectively, ensuring the bottom of the bread chars just as beautifully as the top.
You will also need a sharp bench scraper for portioning the dough without deflating the air pockets. For the glaze, a silicone pastry brush is preferred to ensure an even distribution of the melted butter and garlic bits into every crevice of the fluffy crumb. Much like making fluffy pancakes from scratch, the secret is in the gentle handling of the aerated batter.

Step-by-Step: Crafting the Perfect Loaf
1. Activating the Foundation
In a large glass bowl, combine 1/4 cup (60ml) of warm water (105°F/40°C) with the yeast and a pinch of sugar. Let it sit for 5-10 minutes until a thick foam forms on the surface. This “bloom” is the first sign that your bread will have the “soft, airy” texture we are aiming for.
2. Incorporating the Greek Yogurt
Whisk in 1 cup (245g) of room-temperature Greek yogurt. It is vital that the yogurt is not cold from the fridge, as this will shock the yeast and prevent the dough from becoming fluffy. Once smooth, slowly fold in the flour and salt until a shaggy dough forms.
3. The Kneading and Proofing Phase
Knead the dough on a lightly floured surface for about 5-7 minutes. You are looking for a “supple and slightly tacky” feel. Place the dough in a greased bowl, cover with a damp cloth, and let it rise in a warm, draft-free spot until doubled in size—usually about 60 to 90 minutes.
4. Shaping for the Stacked Look
Gently punch down the dough and divide it into thick portions. To get that “handheld smartphone photo” look, we aren’t looking for perfect symmetry. Shape them into rustic, thick slices or small loaves. Let them proof for a final 20 minutes to ensure the crumb is light and airy.
5. The High-Heat Bake
Preheat your oven to 425°F (220°C). Slide the bread onto your preheated stone or pan. Bake for 15-18 minutes. You are looking for a specific visual cue: the edges should be a deep toasted golden-brown with hints of dark char on the very tips of the bubbles.
6. The Roasted Garlic Glaze
While the bread bakes, melt 4 tbsp (56g) of salted butter in a small saucepan. Add the minced garlic and cook on low heat for 3 minutes until the garlic bits are golden and fragrant. Do not let them burn, or they will turn bitter and ruin the Greek yogurt garlic bread flavor profile.
Expert Tips for Bakery-Quality Results
- Don’t Over-Flour: The dough should be slightly sticky. Too much flour will result in a dense brick rather than a “fluffy greek yogurt dough.”
- Room Temperature Ingredients: Always ensure your yogurt and butter are at room temperature for better emulsification and yeast activity.
- The Steam Hack: Place a small pan of water at the bottom of the oven during the first 10 minutes of baking. This creates a moist environment that allows the bread to expand fully before the crust sets.
- Finishing Salt: Use flaky sea salt as the final touch. The large crystals provide a crunch and a burst of flavor that fine table salt simply cannot match.
Pairing Your Bread with the Perfect Meal
While this Greek yogurt garlic bread is a star on its own, it excels when paired with dishes that can soak up that extra garlic butter. It is the natural companion to a bowl of creamy orzo and mushrooms, where the earthy flavors of the fungi complement the tang of the yogurt dough.
For a lighter lunch, serve a slice alongside buttery melting cabbage or a fresh salad. The protein content in the Greek yogurt makes this bread surprisingly filling, making it a staple in many lunch recipes for busy families.
Storage and Reheating for Maximum Freshness
To maintain the “soft and airy” quality, store any leftover Greek yogurt garlic bread in an airtight container at room temperature for up to 2 days. For longer storage, you can freeze the slices for up to a month.
When reheating, avoid the microwave as it can make the dough rubbery. Instead, wrap the bread in foil and place it in a 350°F (175°C) oven for 5-8 minutes. This will revive the toasted golden-brown crust and melt the butter back into the crumb, making it taste just as fresh as the day it was baked.
While you can, we strongly recommend full-fat Greek yogurt. The fat content is essential for creating the ‘soft, airy’ texture and providing the richness that mimics traditional buttery doughs.
For the specific ‘fluffy and airy’ crumb shown in the photos, yeast is required. Baking powder alone creates a denser, biscuit-like texture, whereas yeast provides the large air pockets and fermented flavor.
The secret is to melt the butter and garlic together over very low heat for just 3 minutes. The garlic should be fragrant and slightly toasted before being brushed onto the bread.
Yogurt moisture levels vary by brand. If your dough is too sticky, add flour 1 tablespoon at a time until it is manageable but still slightly tacky. Do not over-flour, or the bread will become dense.
The Ultimate Greek Yogurt Garlic Bread Recipe
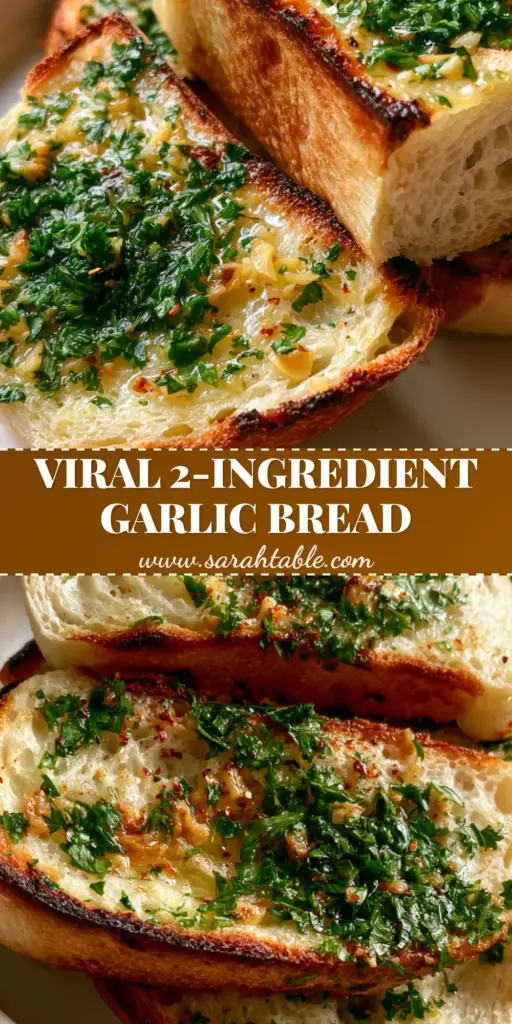
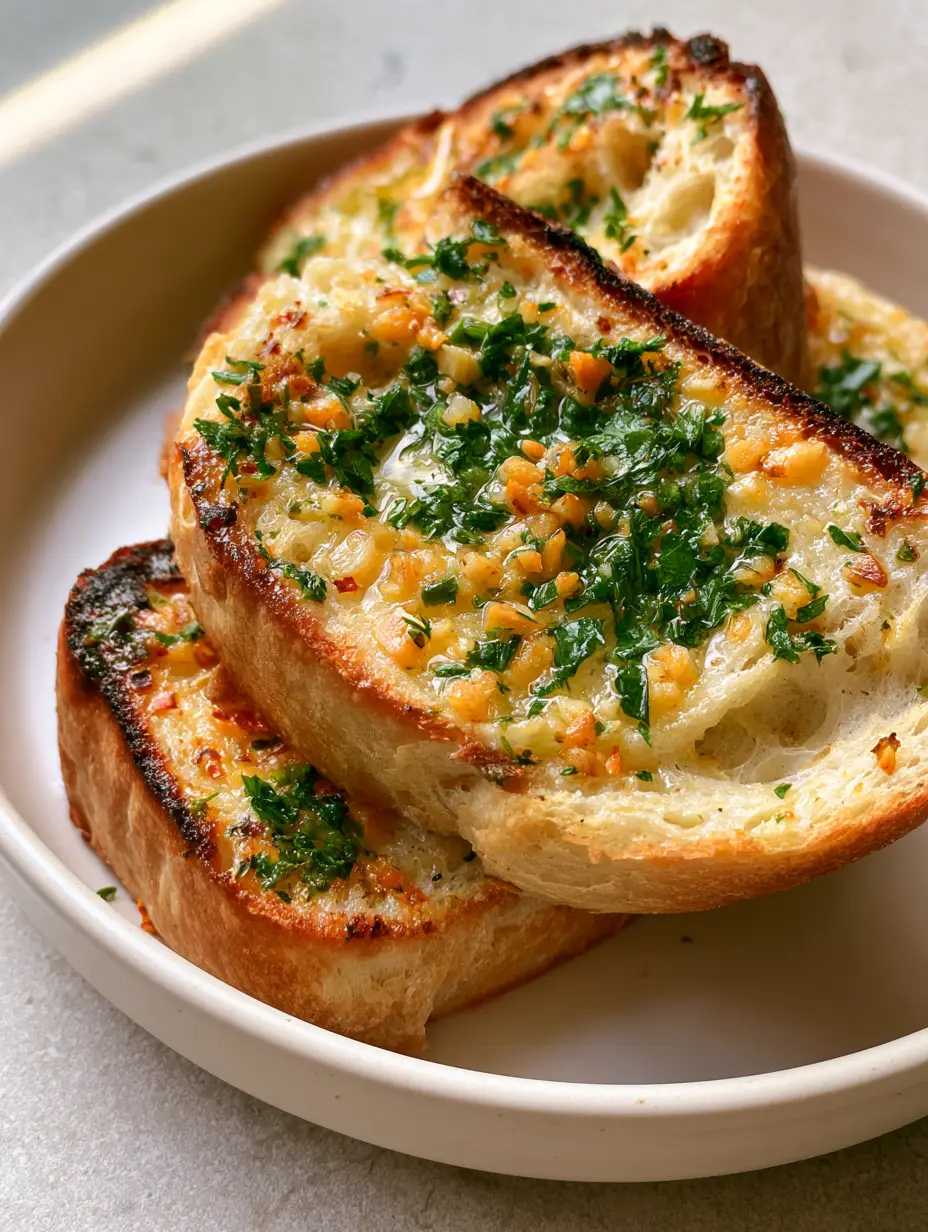
Greek Yogurt Garlic Bread: The Ultimate Fluffy and Roasted Garlic Recipe
Ingredients
Equipment
Method
- Combine warm water, yeast, and a pinch of sugar. Let stand for 10 minutes until foamy.
- Stir in the Greek yogurt, then fold in flour, baking powder, and sea salt until a shaggy dough forms.
- Knead on a floured surface for 5-7 minutes until smooth and supple. Place in a greased bowl.
- Cover and let rise in a warm spot for 60-90 minutes until doubled in size.
- Divide dough into thick slices or rustic loaves. Let rest for 20 minutes while preheating oven to 425°F (220°C).
- Bake for 15-18 minutes on a preheated stone until the crust is toasted golden-brown with charred edges.
- Melt butter with minced garlic over low heat for 3 minutes. Brush generously over hot bread.
- Dust with fresh parsley, red pepper flakes, and a final sprinkle of flaky sea salt.
Notes
Preheating the baking sheet is key for a charred bottom crust.
Final Thoughts on This Artisan Loaf
This Greek yogurt garlic bread is a testament to how simple ingredients can be transformed through technique and attention to detail. By focusing on the visual cues—the char of the crust, the glisten of the butter, and the vibrant greens of the parsley—you create a dish that is as beautiful as it is delicious. We hope this becomes a new favorite in your kitchen. If you enjoyed this recipe, please leave a comment below and share your photos with us by tagging sarah_table on social media! Don’t forget to save this to your favorite boards on Pinterest for later.