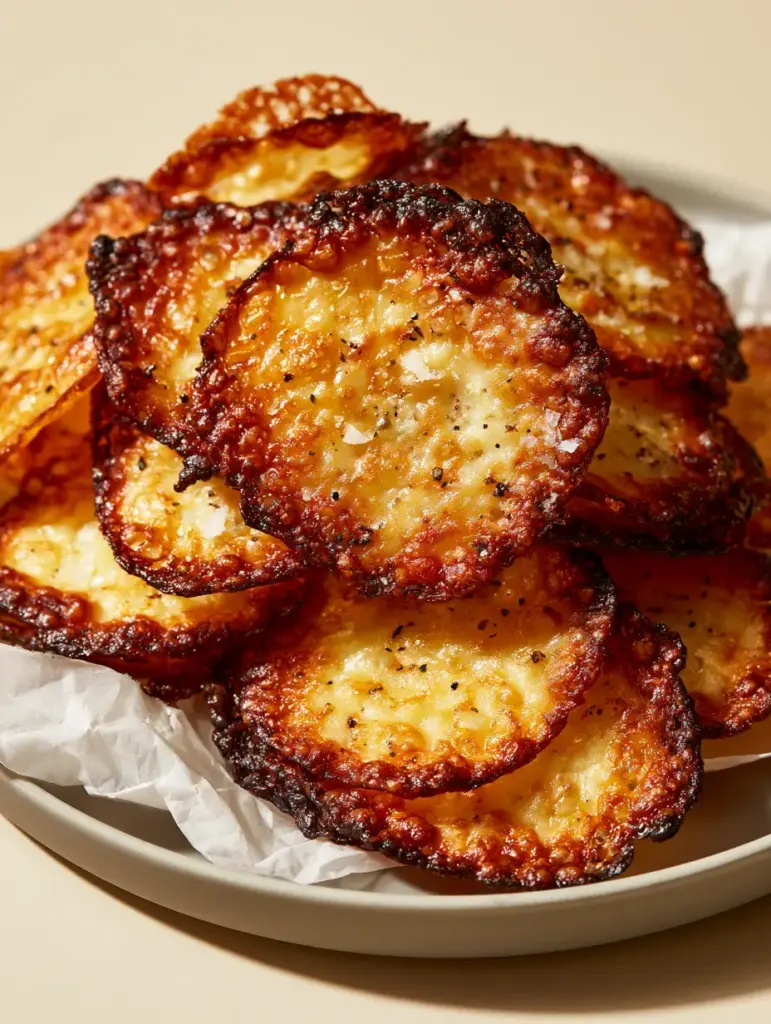
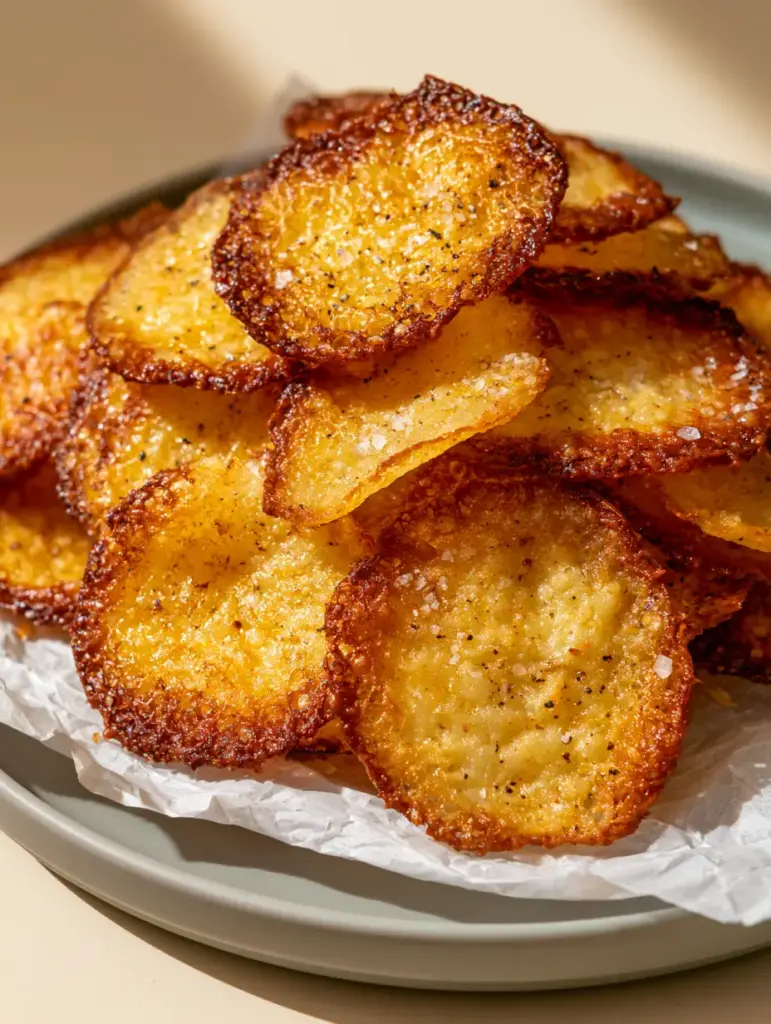
Baked Cottage Cheese Chips are the viral culinary phenomenon taking the low-carb world by storm, offering a deeply satisfying crunch that rivals any traditional potato chip. These ultra-thin, lacy discs deliver a concentrated punch of savory umami, characterized by their translucent golden centers and strikingly dark mahogany edges.
Imagine a snack that shatters with a delicate snap, releasing the toasted aroma of caramelized dairy and the sharp bite of freshly cracked black pepper. This isn’t just a snack; it’s a masterclass in the Maillard reaction, transforming humble curds into an elegant, aerated crisp that feels high-end yet remains incredibly simple to master.
Whether you are looking for a keto-friendly alternative to crackers or simply want to explore the versatile world of modern dairy, these chips provide the perfect canvas for flaked Maldon salt and bold spices. Let’s dive into the science and technique behind achieving that perfect, bubbled texture every single time.
The Unbeatable Appeal of These Lacy Golden Crisps
- Shatter-Crisp Texture: Achieving a bubbled, lacy consistency that is visually stunning and physically lightweight.
- High-Protein Profile: A snack that fits perfectly into a macros-focused lifestyle without sacrificing the “crunch factor.”
- Deep Umami Flavor: The caramelization of the cheese proteins creates a complex, nutty flavor profile far superior to store-bought options.
- Minimalist Elegance: With only a few ingredients, the visual contrast between the mahogany edges and golden centers is a feast for the eyes.
The Essential Components for Ultra-Crispy Chips
The success of your Baked Cottage Cheese Chips depends entirely on the quality of your base and the precision of your seasonings. While the blueprint is simple, each ingredient serves a specific structural and flavor-focused purpose.
Full-Fat Cottage Cheese: You will need 1 cup (225g) of small-curd cottage cheese. The fat content is crucial for the “oily shimmer” and ensures the chips don’t become overly brittle or chalky when the moisture evaporates.
Flaked Sea Salt: Use 1/2 tsp (3g) of Maldon sea salt for the final dusting. These large, flat crystals provide a focused burst of salinity that doesn’t dissolve immediately, maintaining that beautiful “microscopic speck” visual.
Freshly Cracked Black Pepper: Approximately 1/4 tsp (1g) of coarse black pepper is required. The oils in the pepper bloom under the heat of the oven, embedding themselves into the bubbling cheese matrix for a sophisticated heat.
Non-Stick Support: While not an ingredient in the chips themselves, high-quality parchment paper is a “foundational invisible.” It allows the cheese to spread into ultra-thin discs without sticking to the pan.
Must-Have Kitchen Tools for Success
To replicate the macro-shot perfection of professional food photography, you need the right conduit for heat. A standard rimmed baking sheet is the baseline, but the surface treatment is where the magic happens.
You must use a roll of white parchment paper. To achieve the aesthetic in our visual guide, roughly crumple the paper before smoothing it back out; this creates microscopic ridges that help the hot air circulate under the lacy edges of the Baked Cottage Cheese Chips.
A small offset spatula or the back of a measuring spoon is also vital. These tools allow you to flatten the cottage cheese mounds into perfectly thin, translucent circles before they ever hit the heat.
The Step-by-Step Evolution of a Cottage Cheese Crisp
Preparing the Canvas
Preheat your oven to 400°F (200°C). This high temperature is non-negotiable, as it forces the rapid evaporation of water, which is what creates the “bubbled, aerated texture” we are looking for.
Line your heavy-duty baking sheet with the previously crumpled white parchment paper. The texture of the paper provides a minimalist, rustic backdrop that mirrors the artisanal quality of the chips.
The Art of the Dollop
Place 1 tbsp (15g) mounds of cottage cheese onto the parchment paper, leaving at least 3 inches (7.5cm) of space between each. These chips will spread significantly as the fats melt and the proteins relax.
Using the back of your spoon, gently press down on the center of each mound until it forms a thin, even disc. You should almost be able to see the white parchment through the cheese; this ensures the “translucent golden center” remains light and crisp.
Seasoning for Visual Impact
Sprinkle a few flakes of Maldon sea salt and a pinch of cracked black pepper over each disc. Do not over-season at this stage, as the flavors will concentrate as the chips shrink and dehydrate in the oven.
If you enjoy experimenting with flavors, consider pairing these with cottage cheese cheese sticks for a textural contrast on your snack board. The salt should look like tiny jewels against the pale cheese.
Monitoring the Maillard Transformation
Slide the tray into the center rack of the oven. Bake for 15-20 minutes, but start your visual “forensic check” at the 12-minute mark. You are looking for specific sensory cues.
The edges must transition from pale yellow to a “dark, deeply caramelized mahogany.” Meanwhile, the centers should stay “translucent golden-yellow.” If the centers are still white and opaque, they will be chewy rather than crunchy.
The Cooling and Setting Phase
Remove the tray from the oven when the chips are bubbling vigorously and the edges are dark. Let them sit on the tray for at least 5 minutes. As they cool, the “oily shimmer” will settle, and the lacy structure will harden into a rigid, snackable form.
Gently lift them using your fingers or a thin spatula. They should feel ultra-light and should emit a distinct “snap” when broken. Serve them on a minimalist matte-grey ceramic plate to highlight their golden hues.
Expert Strategies for Perfect Texture
- Moisture Management: If your cottage cheese is particularly “soupy,” strain it through a fine-mesh sieve for 5 minutes before portioning. This accelerates the crisping process.
- The Spacing Rule: Never crowd the pan. If the steam from one chip hits another, you will end up with soft, rubbery edges instead of the “lacy” finish.
- Consistent Thickness: Ensure the center is as thin as the edges. A thick center will remain a “puddle” of melted cheese while the edges burn.
- Visual Cue Mastery: Look for the “bubbling” to slow down. When the bubbles become small and frequent, most of the water has escaped, and the chip is nearing completion.
Creative Pairings for Your Savory Crisps
These Baked Cottage Cheese Chips are exceptional on their own, but they also serve as a sophisticated vessel for dips and side dishes. For a light lunch, serve them alongside a cucumber crab salad to add a necessary crunch to the creamy seafood.
If you are hosting a brunch, these chips offer a unique alternative to toast when served with cottage cheese with cucumbers. The double-dose of cottage cheese in different textures is a delight for enthusiasts of the ingredient.
For a full dinner experience, use these chips as a garnish for parmesan crusted baked salmon or serve them as an appetizer before a plate of savory garlic mushrooms. Their versatility makes them a staple for any “Elite Food Blog” kitchen.
Storage and Preservation of the Crunch
To maintain that ultra-thin, lacy snap, storage is key. These chips are sensitive to humidity and will absorb moisture from the air, turning soft if left out.
Store fully cooled chips in an airtight glass container with a piece of parchment paper between layers. They will stay fresh at room temperature for up to 48 hours, though they are best enjoyed the day they are made.
If they do lose their crunch, a quick 2-minute “refresh” in a 300°F (150°C) oven will drive off any absorbed moisture and restore that mahogany-edged perfection.
Frequently Asked Questions
Yes! These chips are essentially pure protein and fat with negligible carbohydrates, making them an ideal keto-friendly snack alternative to potato chips.
It is not recommended. Fat-free cottage cheese lacks the lipids necessary for the Maillard reaction to create that ‘oily shimmer’ and lacy texture; the result will likely be brittle and dry.
The lacy texture comes from the water content of the cheese evaporating and leaving behind a protein matrix. High heat and proper spacing on crumpled parchment paper are essential for this ‘aerated’ look.
Place them back in a 300°F (150°C) oven for 2-3 minutes. This will quickly evaporate any humidity they absorbed from the air and restore their original shatter-crisp texture.
Soggy centers usually occur if the cheese was not flattened thin enough or if the oven temperature was too low. Ensure each disc is translucent before baking and use a true 400°F (200°C) heat.
The Definitive Baked Cottage Cheese Chips Recipe
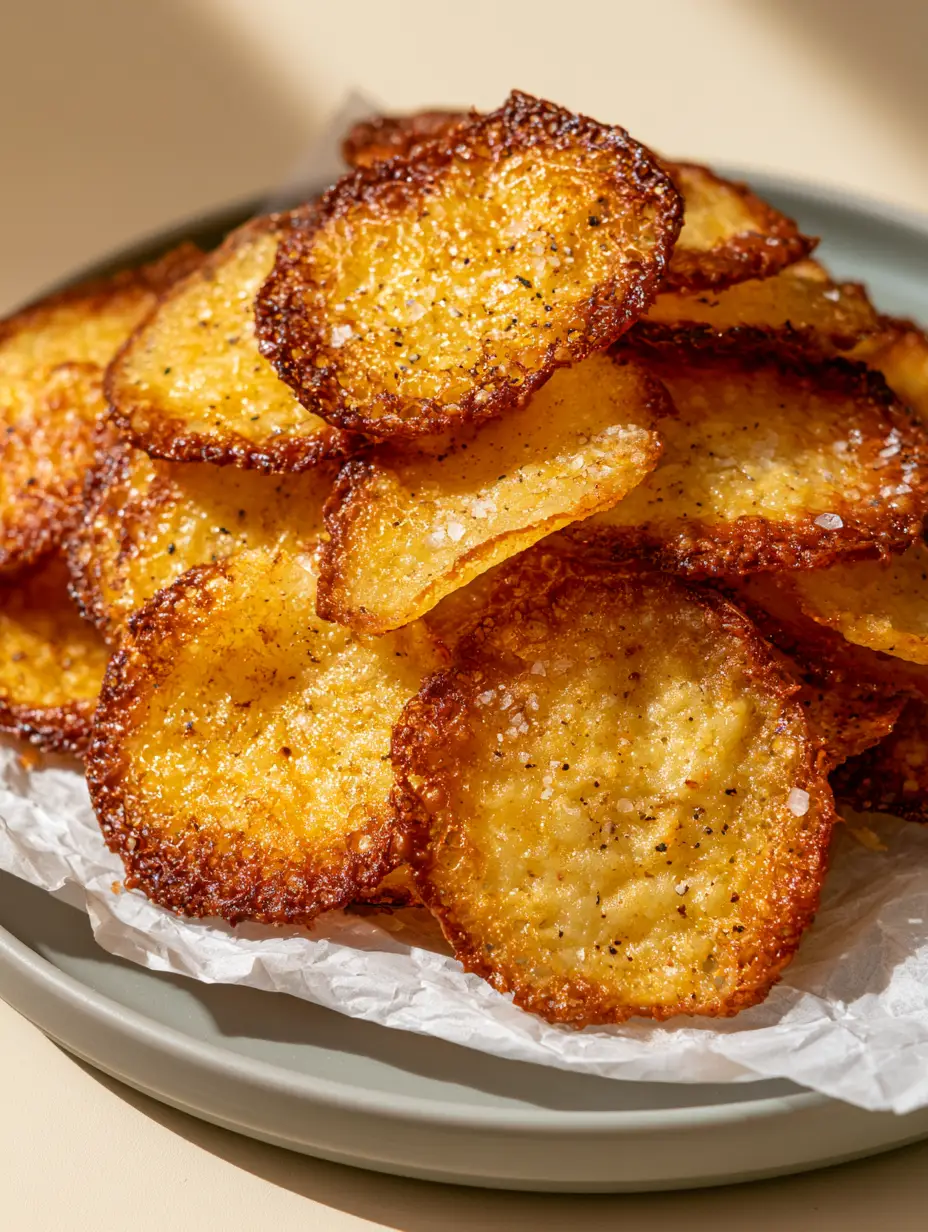
Baked Cottage Cheese Chips: The Ultimate Lacy High-Protein Snack
Ingredients
Equipment
Method
- Preheat your oven to 400°F (200°C). Line a rimmed baking sheet with a piece of crumpled and then flattened white parchment paper.
- Place 1 tbsp (15g) mounds of cottage cheese onto the parchment, spaced at least 3 inches apart.
- Using the back of a spoon, press the mounds into ultra-thin, translucent discs. Ensure they are evenly flat.
- Dust each disc with flaked sea salt and cracked black pepper.
- Bake for 15-20 minutes. Watch for the edges to turn a deep mahogany brown while the centers stay golden and lacy.
- Remove from the oven and allow to cool on the pan for 5 minutes until fully hardened and crisp.
Notes
If chips are chewy, bake for another 2-3 minutes until edges are darker.

Closing Thoughts on This Modern Snack
Mastering Baked Cottage Cheese Chips is a rewarding journey into the world of texture and temperature. By focusing on the visual cues—the bubbling, the browning, and the translucence—you can create a gourmet snack that is as beautiful as it is delicious.
We invite you to share your results and tag us in your photos! Don’t forget to follow Sarah’s Table on Pinterest for more high-protein recipe inspiration and kitchen science tips. Let us know in the comments: what is your favorite seasoning for these lacy crisps?