There is nothing quite like the sensory experience of a warm cinnamon roll, but when you combine that classic flavor with the decadent, tangy richness of a cheesecake, you create something truly legendary. These Cinnamon Roll Cheesecake Cookies are engineered to be the crown jewel of your baking repertoire, featuring a soft, chewy dough that hides a secret, molten surprise.
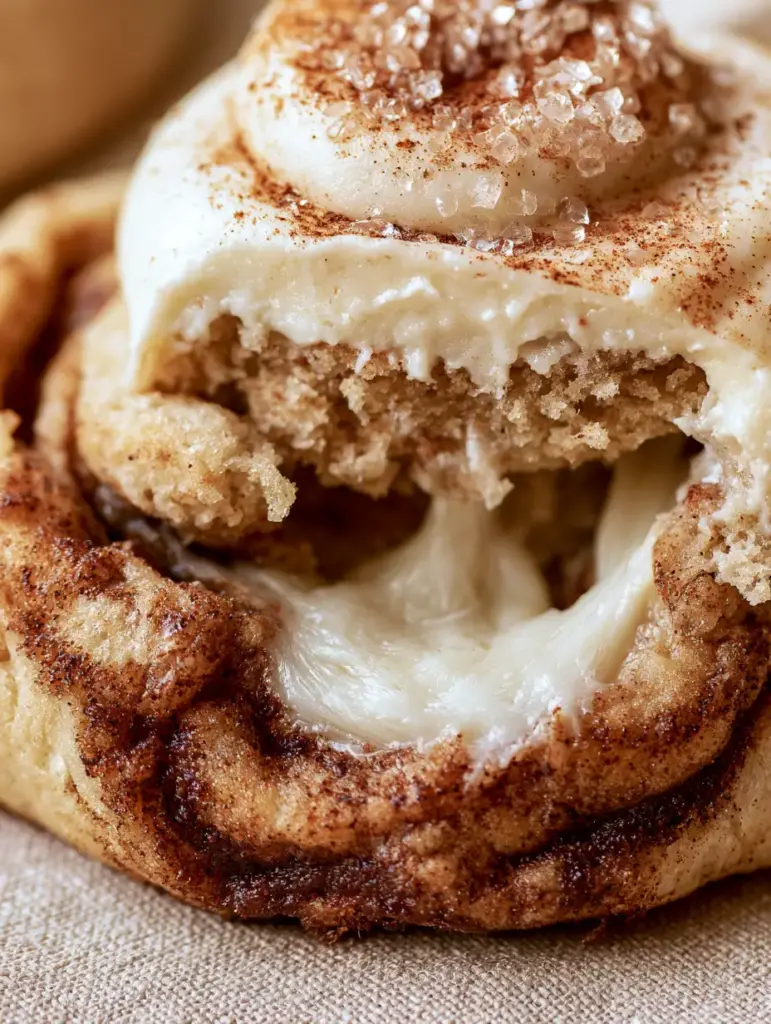
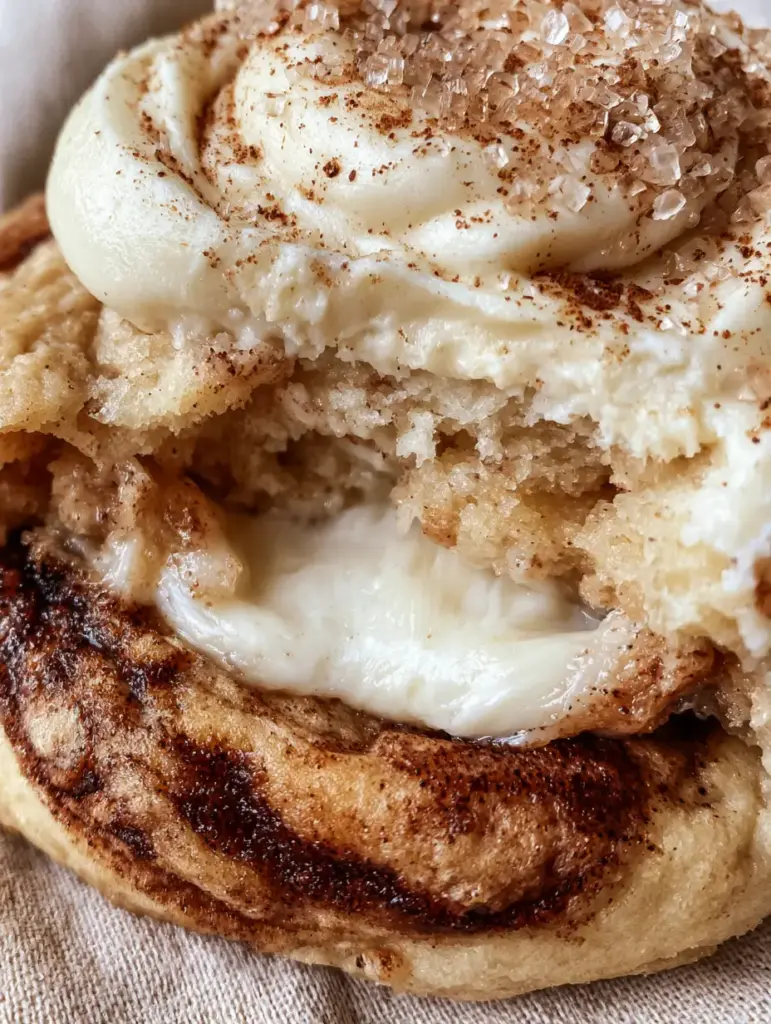
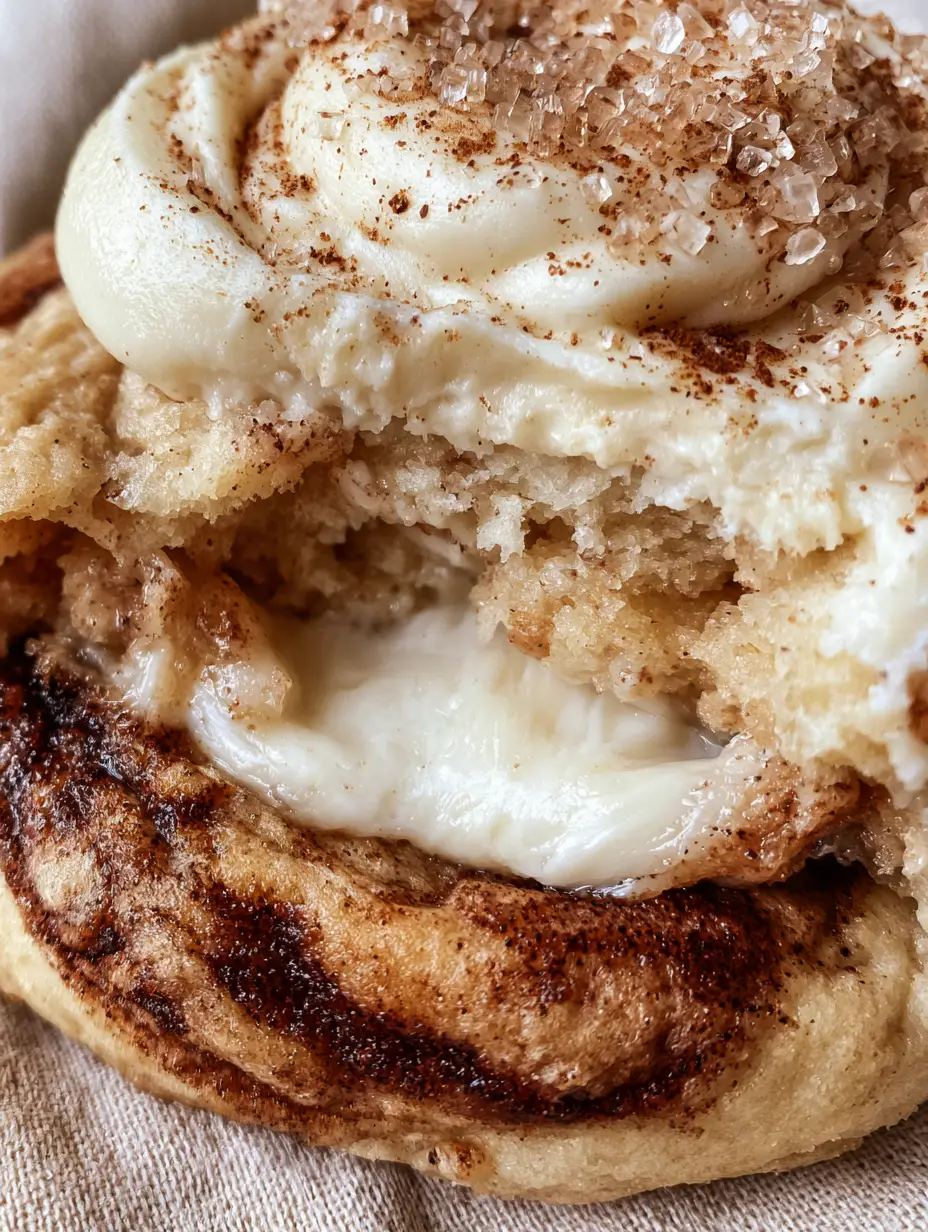
Imagine breaking into a thick, golden-brown cookie to find a liquid-silk center of warm cream cheese. The exterior isn’t just a plain sugar cookie; it is a meticulously marbled canvas of dark, caramelized cinnamon-sugar swirls and sparkling sugar crystals that catch the light perfectly.
Whether you are a seasoned baker or an enthusiastic home cook, this recipe provides the professional techniques needed to achieve that “bakery-style” look. From the glossy white frosting swirl to the delicate dusting of fine cinnamon, every element of these Cinnamon Roll Cheesecake Cookies has been designed for maximum flavor and visual impact.
Why These Molten Cinnamon Roll Cheesecake Cookies Are a Viral Sensation
- The Molten “Liquid-Silk” Center: Unlike traditional stuffed cookies that can become dry, our technique ensures the cream cheese filling remains gooey and warm.
- Exaggerated Textures: You get the crunch of large-grain sparkling sugar, the soft crumb of the dough, and the velvet sheen of the frosting in every single bite.
- Visual Masterpiece: The heavy marbling of dark cinnamon against the light golden dough creates a stunning contrast that looks like it came from a high-end boutique bakery.
- Professional Glossy Finish: We use a specific ratio of cream cheese and heavy cream to ensure your frosting swirl is glossy and professional, not matte or chalky.
Foundational Ingredients for the Perfect Marbled Dough
Unsalted Butter (1 cup / 225g): We use softened butter to create a stable emulsion with the sugars, providing that essential soft cookie crumb that melts in your mouth.
Light Brown Sugar (1 cup / 200g) & Granulated Sugar (1/2 cup / 100g): The high ratio of brown sugar is non-negotiable; it provides the moisture and molasses notes required for a chewy, cinnamon-roll-like base.
Full-Fat Cream Cheese (12 oz / 340g total): Divided between the filling and the frosting, using full-fat blocks ensures the structure is sound and the flavor is authentically tangy.
Cinnamon & Dark Brown Sugar Slurry: This “invisible” step involves creating a concentrated paste that we marble into the dough at the very last second to prevent the dough from turning a uniform brown.
All-Purpose Flour (3 cups / 375g) & Cornstarch (1 tbsp / 8g): The addition of cornstarch is a professional secret for “soft-set” cookies, keeping the edges golden-brown while the interior stays tender.
Sparkling Sugar Crystals: Also known as sanding sugar, these large-grain crystals provide a distinct crunch and a professional, shimmering finish that mimics high-end pastries.
Essential Kitchen Tools for Professional Results
To achieve the specific textures described in our visual blueprint, you will need a few key pieces of equipment. A standard baking sheet is fine, but a heavy-duty light-colored aluminum pan will prevent the bottoms from over-browning before the center is set.
A small cookie scoop (1 tablespoon size) is vital for portioning the cream cheese filling, while a larger scoop (3 tablespoons) ensures the outer dough is consistent. For that professional bakery-style swirl, a piping bag fitted with a large round or star tip is highly recommended.
Finally, a silicone baking mat or high-quality parchment paper is essential. These cookies are filled with “molten” sugar and cheese; a non-stick surface ensures you can lift them without breaking the delicate base.
The Secret to a Liquid-Silk Cheesecake Center
The most common mistake when making stuffed cookies is using room-temperature filling. To get that molten, gooey center seen in our professional photography, you must freeze the cream cheese filling disks for at least 30-60 minutes before stuffing.
This temperature differential allows the outer cookie dough to bake and set while the frozen center slowly melts into a liquid-silk consistency. If the filling is too warm when it enters the oven, it will simply dissolve into the dough, losing that distinct “cheesecake” layer.
If you enjoy this technique, you might also love the texture of our white chocolate raspberry cheesecake cookies, which use a similar chilled-center method.
Mastering the Art of Marbling and Stuffing
Step 1: Preparing the Molten Core
In a small bowl, whip 8 oz (225g) of cream cheese with 1/4 cup (30g) of powdered sugar. Drop tablespoon-sized dollops onto a parchment-lined tray and flatten slightly into disks. Place these in the freezer immediately; they must be rock-solid before you handle them.
Step 2: Creating the Marbled Dough Base
Cream your butter and sugars until pale and fluffy, about 3 minutes. After adding your eggs and dry ingredients, prepare your cinnamon swirl paste by mixing 2 tbsp (30g) melted butter, 1/4 cup (50g) brown sugar, and 1 tbsp (8g) cinnamon. Fold this into the dough very gently—only 2 or 3 turns—to maintain distinct “marbled” ribbons.
Step 3: The Stuffing Technique
Take a large ball of dough and flatten it in your palm. Place a frozen cream cheese disk in the center and wrap the dough around it, ensuring there are no cracks. Roll the ball in your hands to smooth it out, then roll the top half in sparkling sugar crystals for that signature “crunch.”
Step 4: Visual Cues for Baking
Bake at 350°F (175°C) for 11-13 minutes. You are looking for “golden-brown baked edges” while the center still looks slightly underbaked and puffed. As the cookie cools, it will deflate slightly, creating a beautiful crinkle around the molten center.
Crafting the Glossy Cream Cheese Frosting Swirl
The final touch that elevates these Cinnamon Roll Cheesecake Cookies is the professional-style frosting swirl. We avoid heavy, stiff frostings in favor of a glossy, spreadable consistency. By adding a teaspoon of heavy cream or whole milk to your cream cheese frosting, you achieve a sheen that looks incredible under natural window light.
Wait until the cookies are completely cool before frosting. If the cookies are even slightly warm, the glossy frosting will melt and run. Once piped, hit them with a final “delicate dusting” of fine cinnamon powder and a few extra sugar crystals to mirror the textures found in our visual blueprint.
Expert Tips for Success
- Don’t Over-Mix: To keep the dough soft and “crumb-like,” stop mixing as soon as the flour disappears. Over-working the gluten will result in a tough, bread-like cookie.
- The “Soothe” Method: If your cookies come out of the oven looking a bit misshapen, use a large circular glass or cookie cutter to gently “scoot” the edges into a perfect circle while they are still hot.
- Chill the Dough: If your kitchen is warm, chill the entire bowl of dough for 20 minutes before marbling. This keeps the cinnamon swirls from bleeding into the base dough.
- Use Block Cream Cheese: Never use “whipped” or tub-style cream cheese for the filling. It contains too much air and water, which will cause the cookies to explode in the oven.
What to Serve With This Decadent Treat
These cookies are incredibly rich, so they pair best with beverages that offer a bit of contrast. A cold glass of milk is a classic choice, but a bitter espresso or a dark roast coffee perfectly cuts through the “molten” sweetness of the cheesecake center.
If you are planning a full brunch spread, these cookies make a fantastic dessert alongside fluffy pancakes or a savory dish like black bean enchiladas for a “sweet and savory” balance. For those looking for lighter options, our diabetic-friendly alternatives offer a great way to include everyone at the table.
Frequently Asked Questions
While possible, you won’t get the same soft cookie crumb or the specific marbled effect. This recipe uses a dedicated cookie dough for better structural integrity.
Yes, because of the cream cheese filling and frosting, these should be kept in the fridge. Simply reheat for 10 seconds before eating for that molten center.
The secret is adding a tiny amount of heavy cream or corn syrup to the frosting. This prevents it from drying into a matte finish and keeps it looking fresh and shiny.
Don’t over-mix the cinnamon slurry into the dough. Use a spatula to fold it only 2-3 times so you see thick, distinct ribbons of dark cinnamon sugar.
This usually happens if the filling wasn’t frozen solid before stuffing or if there were small cracks in the dough. Ensure the dough completely encases the frozen filling.
The Ultimate Cinnamon Roll Cheesecake Cookies Recipe
Cinnamon Roll Cheesecake Cookies: The Ultimate Molten Stuffed Bakery Treat
Ingredients
Equipment
Method
- Whip cream cheese and 1/4 cup powdered sugar. Drop 18 small dollops onto parchment and freeze for 30-60 minutes until rock solid.
- Cream butter and sugars. Add eggs and vanilla. Fold in flour, baking soda, salt, and cornstarch until just combined.
- Mix 1 tbsp cinnamon with 2 tbsp melted butter and 1/4 cup brown sugar. Drizzle over dough and fold twice to create thick ribbons.
- Scoop 3 tbsp of dough, flatten, place a frozen cheese disk inside, and seal carefully. Roll the top in sparkling sugar.
- Bake at 350°F (175°C) for 11-13 minutes until edges are golden-brown but center is still soft.
- Once cooled, pipe a swirl of glossy cream cheese frosting on top and dust with extra cinnamon.
Notes
Use light-colored pans to prevent the bottoms from burning.
How to Store and Reheat for That Fresh-From-the-Oven Gooeyness
Because these cookies contain a high ratio of cream cheese, they should be stored in an airtight container in the refrigerator for up to 5 days. However, they are best enjoyed warm to maintain that “liquid-silk” center.
To reheat, simply place a cookie in the microwave for 8-10 seconds. This is just enough time to soften the cream cheese filling without melting the glossy frosting swirl. You can also freeze the unbaked stuffed dough balls for up to 3 months, baking them directly from frozen—just add 2 minutes to the total bake time!
These Cinnamon Roll Cheesecake Cookies are more than just a dessert; they are a decadent experience of texture and flavor. We would love to see your baking results! Be sure to leave a comment below and share your photos with us on Pinterest.