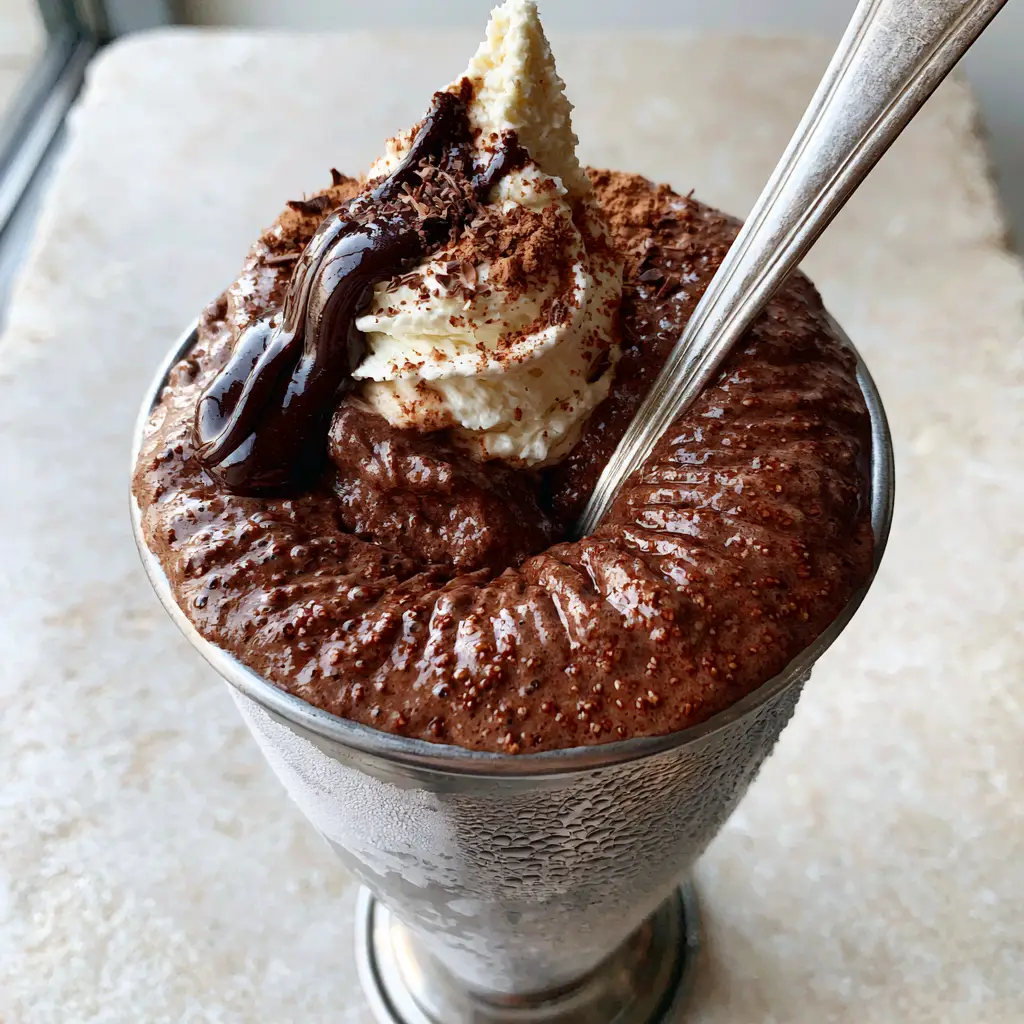
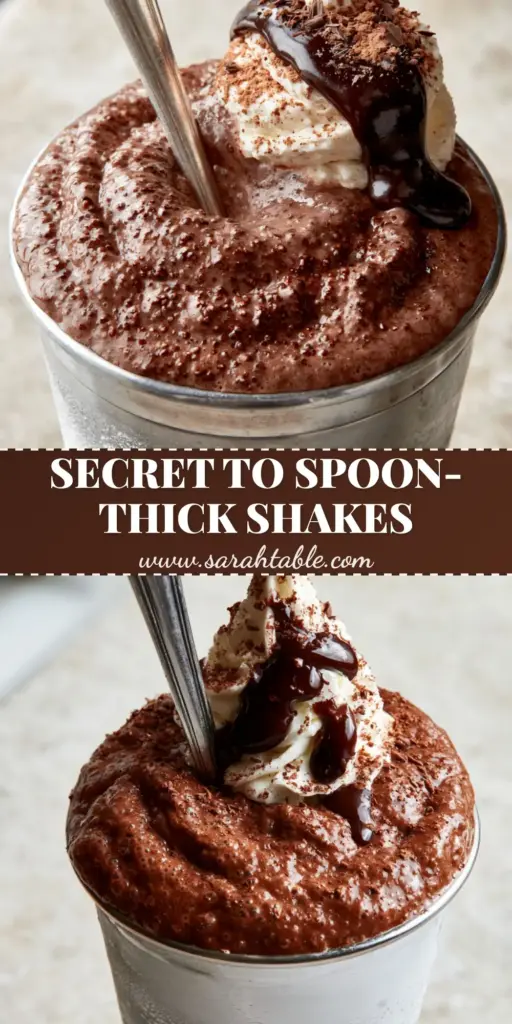
When it comes to the ultimate indulgence, few things rival the nostalgic pull of professional chocolate milkshake recipes. But we aren’t talking about the thin, watery drinks from a fast-food drive-thru. We are crafting a visceral, sensory experience—a shake so dense and velvety that a heavy silver spoon can stand perfectly upright in its center without leaning a single degree.
Imagine a tall, chilled vintage stainless steel diner cup, its exterior frosted with a fine layer of condensation that beads and drips as you hold it. Inside, an incredibly dark, viscous liquid awaits, rippled with the texture of premium dark chocolate ice cream and flecked with the visible grains of high-quality Dutch-processed cocoa powder. This is the gold standard of chocolate milkshake recipes, designed for those who demand intensity in every sip.
To top it off, we introduce a single, stiff peak of homemade whipped cream, adorned with a slow-moving, glossy dark chocolate fudge drizzle that clings stubbornly to the peaks. A light dusting of cocoa powder and tiny chocolate shavings provide the final architectural touch to this culinary monument. Let’s dive into the science and soul of the perfect dark chocolate shake.
Why This Viscous Dark Chocolate Shake Stands Above the Rest
- Extreme Viscosity: By utilizing a specific ratio of high-butterfat ice cream to minimal whole milk, we achieve a texture that is more “velvet” than “liquid.”
- Double-Chocolate Depth: We don’t rely solely on ice cream; the addition of Dutch-processed cocoa powder adds a sophisticated bitterness and a grain-rich visual appeal.
- Thermal Engineering: Using a stainless steel diner cup isn’t just for aesthetics; the metal retains sub-zero temperatures, keeping the shake thick until the very last drop.
- Professional Garnish: The contrast between the matte cocoa dusting and the glossy ganache drizzle creates a high-end food blog aesthetic right in your kitchen.
The Anatomy of an Elite Chocolate Shake: Essential Ingredients
Dark Chocolate Ice Cream: Choose a premium brand with at least 12-15% butterfat. This high fat content is the structural backbone that allows the spoon to stand upright and provides a rich, lingering mouthfeel.
Whole Milk (240ml / 1 cup): Use full-fat milk to maintain the emulsion. Skim or low-fat varieties contain too much water, which will create ice crystals and thin out the viscosity we are striving for.
Dutch-Processed Cocoa Powder (15g / 2 tbsp): Unlike natural cocoa, Dutch-processed is alkalized, giving it a darker hue and a smoother, mellower flavor profile. It also provides those signature “grains” seen in artisanal shakes.
Glossy Dark Chocolate Ganache: A blend of heavy cream and 70% dark chocolate creates a drizzle that is thick and reflective. This is the “slow-moving” element that defines the visual luxury of this recipe.
Heavy Whipping Cream (120ml / 0.5 cup): This must be whipped to stiff peaks. If it is too soft, it will melt into the shake; we want it to sit like a mountain peak on top of the dark chocolate sea.
Fine Chocolate Shavings: Use a microplane or a sharp knife to shave a bar of bittersweet chocolate. These tiny shards melt instantly on the tongue, providing a secondary texture to the smooth shake.
Pinch of Sea Salt: A foundational “invisible” ingredient. Salt suppresses bitterness and amplifies the perception of sweetness and chocolate intensity.
Foundational Gear for the Perfect Emulsion
To achieve the result described in our visual blueprint, you need more than just a blender. A high-speed professional blender is preferred to ensure the cocoa powder is fully incorporated without aerating the mixture too much. If you use a standard blender, work in short pulses to avoid heating the motor, which can melt the ice cream.
The vintage stainless steel diner cup is non-negotiable for the “handheld smartphone photo” aesthetic. Stainless steel is an excellent thermal conductor, allowing the exterior to frost over quickly when filled with the sub-zero shake. Finally, ensure you have a heavy silver spoon; its weight is the ultimate test of the shake’s density.
The Multi-Phase Method for Extreme Viscosity
Phase 1: The Stainless Steel Pre-Chill
Place your stainless steel diner cup in the freezer for at least 20 minutes before you begin. A room-temperature cup will cause the edges of the shake to melt instantly, destroying the rippled surface texture. You want the cup so cold that condensation forms the second it hits the kitchen air.
Phase 2: Crafting the Glossy Ganache Drizzle
In a small microwave-safe bowl, combine 2 tbsp (30ml) of heavy cream and 1 oz (28g) of finely chopped dark chocolate. Heat in 15-second intervals, stirring until glossy and smooth. Set this aside to cool slightly; it needs to be viscous enough to “cling” to the cream rather than running off like water.
Phase 3: The Stiff Peak Whipped Cream
Whip 0.5 cup (120ml) of cold heavy cream with a teaspoon of powdered sugar until it reaches stiff peaks. When you lift the whisk, the cream should stand straight up without drooping. This structural integrity is vital for supporting the ganache and shavings.
Phase 4: Blending for Density
Add 3 large scoops (approx. 450g) of dark chocolate ice cream, 0.25 cup (60ml) of whole milk, 2 tbsp (15g) of Dutch-processed cocoa powder, and a pinch of salt to the blender. Pulse 5-7 times. Avoid over-blending; you want the mixture to be thick enough that you almost have to shake the blender jar to get it to move.
Pro-Level Mastery: Ensuring Your Spoon Stands Upright
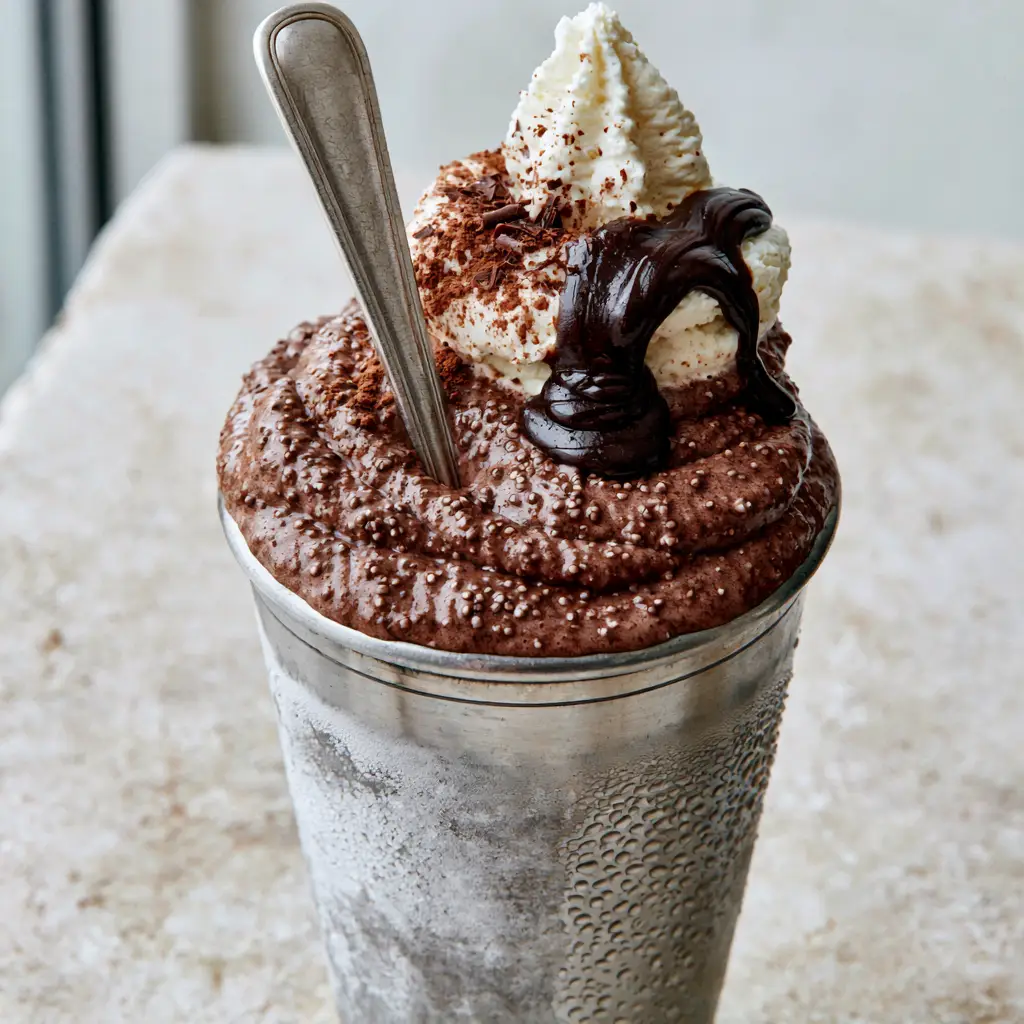
The hallmark of the best chocolate milkshake recipes is the “upright spoon test.” If your spoon falls to the side, your milk-to-ice-cream ratio is too high. Always start with less milk than you think you need. You can always add a splash more, but you can’t take it away once the emulsion is broken.
Another tip is to check the “visual and sensory cues” during blending. Look for a deep, matte brown color and a surface that ripples rather than swirls. If you see bubbles or a frothy top, you have introduced too much air. Professional shakes are dense and heavy, not light and airy.
Preserving the Chill: Storage and Prep Ahead
Milkshakes are best enjoyed immediately, but you can prep components in advance. The ganache can be made a day ahead and gently reheated. You can also pre-scoop your ice cream onto a parchment-lined tray and freeze the scoops solid; this prevents the blender from having to work too hard to break down large blocks of ice cream, keeping the final temperature lower.
If you find yourself with leftovers, you can pour the mixture into a silicone mold and freeze it. It won’t have the same texture once thawed, but it makes for an incredible frozen treat or a base for a future blended drink.
What to Serve with an Indulgent Chocolate Treat
A shake this intense needs a savory counterpart to balance the palate. For a classic diner experience, pair this with savory hamburger steaks or a plate of salty, crispy fries. If you’re looking for something lighter but still savory, try homemade parmesan crisps for a salty crunch.
If you are serving this as part of a grand dessert spread, it pairs beautifully with baked blueberry donuts—the tartness of the berries cuts through the heavy dark chocolate. For those who enjoy a “boozy dessert” vibe, follow this shake with a frozen strawberry margarita to cleanse the palate with citrus and ice.
For a full meal before your dessert, consider the bold flavors of Korean beef bowls, which offer a spicy-salty kick that makes the sweet chocolate even more rewarding.
Common Curiosities About Professional Milkshake Crafting
You can, but the flavor will be more acidic and the color will be lighter. Dutch-processed cocoa provides the deep, dark hue and mellow flavor characteristic of professional shakes.
The key is viscosity. Use premium ice cream with high butterfat, minimal milk, and ensure your stainless steel cup is pre-chilled to keep the mixture dense.
Let your ganache cool until it is thick and glossy. If it’s too hot, it will melt the whipped cream; if it’s too cold, it won’t flow. It should be the consistency of warm honey.
This usually happens due to a high milk-to-ice-cream ratio or over-blending. To fix it, add more ice cream and use short pulses to maintain a sub-zero temperature.
Stainless steel is a superior thermal conductor, meaning it chills quickly and stays cold, preventing the shake from melting while you enjoy it.
The Definitive Dark Chocolate Diner Shake Recipe
Chocolate Milkshake Recipes: The Ultra-Thick Diner-Style Dark Chocolate Masterpiece
Ingredients
Equipment
Method
- Place the stainless steel diner cup in the freezer for 20 minutes to ensure a frosted exterior and maintain shake viscosity.
- Combine 1 oz dark chocolate and 2 tbsp heavy cream in a bowl; microwave in 15-second bursts until glossy and slow-moving.
- Whip 0.5 cup heavy cream to stiff peaks. It should hold its shape perfectly when the whisk is removed.
- Pulse ice cream, milk, cocoa powder, and salt in a blender until rippled and thick. Do not over-process.
- Pour into the chilled cup. Add a peak of whipped cream, drizzle with ganache, and dust with cocoa and shavings. Insert spoon upright.
Notes
Dutch-processed cocoa is essential for the dark color and deep flavor.
Closing & Call to Action
Mastering chocolate milkshake recipes is an essential skill for any home cook looking to bring the magic of a vintage diner into their modern kitchen. The key lies in the quality of your dark chocolate and the patience to achieve that perfect, upright-spoon viscosity. Once you’ve created this masterpiece, the visual of the glossy ganache against the stiff white cream is something you’ll want to share.
If you enjoyed this deep dive into culinary physics and chocolate indulgence, please leave a comment below! I’d love to hear how your “spoon test” went. Don’t forget to follow me on Pinterest for more visually stunning recipe inspiration and save this pin to your “Dessert Goals” board!