When you need a dinner that hits the table in under 30 minutes but looks like it came from a high-end bistro, these Korean beef bowls are the ultimate solution. This dish captures the perfect harmony of textures: the softness of steamy jasmine rice, the aggressive crunch of caramelized beef, and the high-gloss sheen of a mahogany-colored soy-ginger glaze.
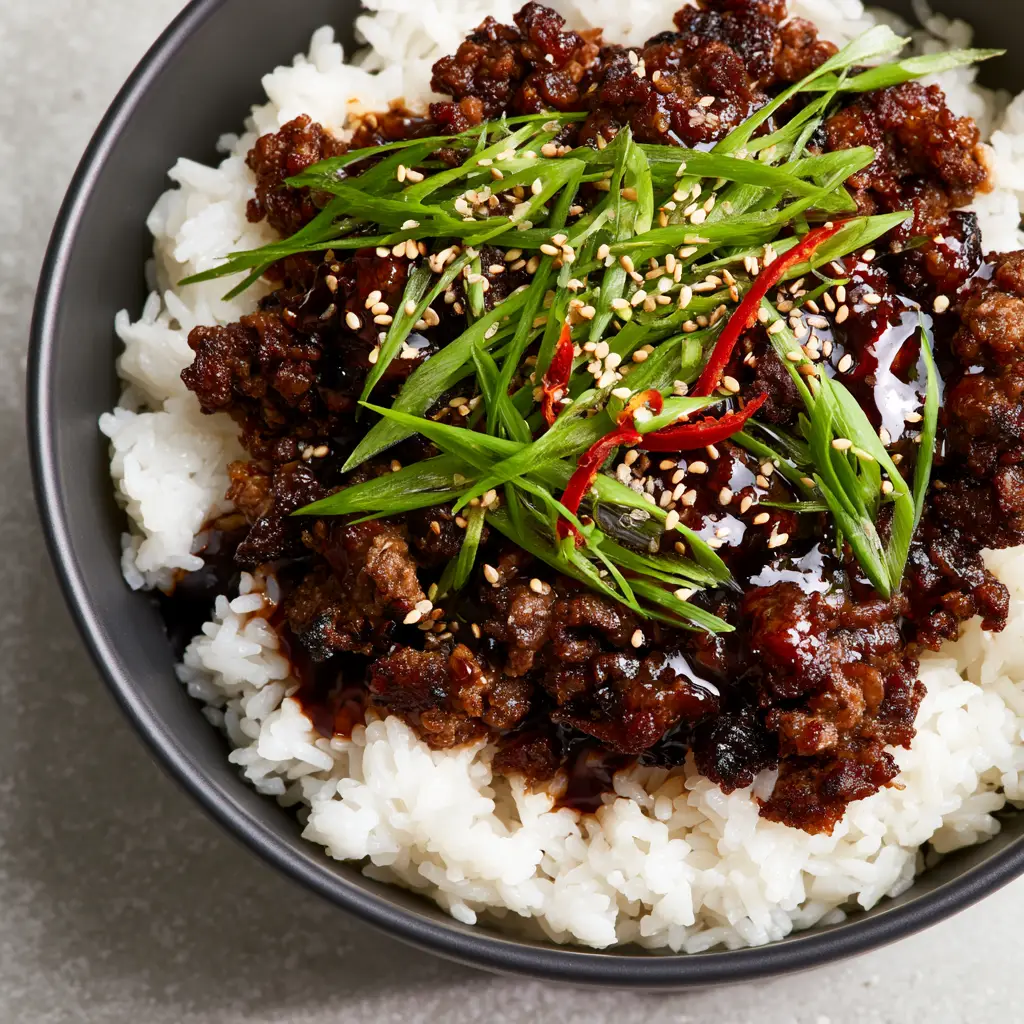
The visual appeal of these Korean beef bowls is undeniable. Imagine a modern matte charcoal ceramic bowl filled with vibrant colors—from the lime-green of fresh scallions to the deep crimson of julienned red chili curls—all glistening under a thick, savory sauce that reflects the light. It is a sensory experience that begins long before the first bite.
In this guide, we will break down the culinary science behind achieving those sought-after charred beef edges and the secret to a glaze so glossy it looks like liquid silk. Whether you are a seasoned home cook or just starting out, this recipe provides the blueprint for a restaurant-quality meal in your own kitchen.
Why These Savory Rice Bowls Win Every Time
- The Maillard Reaction: We focus on high-heat searing to ensure the ground beef isn’t just cooked, but deeply browned with crispy, caramelized edges that provide an essential textural contrast.
- The “Glassy” Glaze: By balancing brown sugar with high-quality soy sauce and fresh aromatics, we create a dark mahogany glaze that clings to every crumble of beef without becoming watery.
- Visual Precision: From the ultra-thinly sliced scallions to the delicate red chili curls, every garnish serves a dual purpose of aesthetic beauty and bright, fresh flavor.
- Speed and Efficiency: This is a true “pantry staple” meal that feels luxurious, making it perfect for busy weeknights when you still want a sophisticated dining experience.
The Essential Pantry Staples for Umami-Packed Beef
1 lb (454g) Lean Ground Beef: We recommend an 85/15 or 90/10 blend. The fat content is crucial for achieving those crispy, charred edges without the meat drying out during the high-heat sear.
1.5 cups (285g) White Jasmine Rice: This long-grain variety provides a floral aroma and a “steamy” foundation. Rinsing the rice until the water runs clear is a non-negotiable step for achieving fluffiness.
1/2 cup (120ml) Low-Sodium Soy Sauce: This provides the salt and the deep, dark mahogany color. Using low-sodium allows us to control the seasoning precisely without it becoming overbearing.
1/3 cup (65g) Light Brown Sugar: The molasses in the brown sugar is the secret to the thick, glossy finish. It caramelizes quickly, helping the sauce “drench” the beef in a reflective coating.
1 tbsp (15ml) Toasted Sesame Oil: Added at the end, this “finishing” oil provides an unmistakable nutty aroma that bridges the gap between the beef and the jasmine rice.
1 tbsp (6g) Fresh Ginger, grated: Fresh ginger provides a sharp, zingy counterpoint to the heavy umami of the beef. Do not substitute with dried ginger for this specific recipe.
3 cloves Garlic, minced: Garlic is the foundational aromatic. We add it after the beef has browned to prevent it from burning and becoming bitter.
1/2 tsp (1g) Red Pepper Flakes: For a subtle, underlying heat that doesn’t overwhelm the palate. If you love heat, you can increase this, but the fresh chili garnish will also provide a kick.
2-3 Green Scallions: Use both the white and the lime-green parts. Slice them “ultra-thin” on a bias for that professional, high-end look.
1 Fresh Red Chili: Use a Fresno or Red Bird’s Eye chili. Sliced into julienned curls, these add a pop of color and a fresh, snapping heat.
1 tbsp (9g) Toasted White Sesame Seeds: These add a delicate crunch and a “precise scatter” of visual interest over the dark beef.
1 tbsp (15ml) Neutral Oil: Think avocado or grapeseed oil. This foundational ingredient is required to get the pan hot enough for a proper sear. If you are looking for other high-protein inspirations, you might enjoy our deconstructed burger bowls for a similar vibe.
Precision Tools for a Better Sear
Heavy Cast Iron or Carbon Steel Skillet: To achieve the “charred edges” described in our visual blueprint, you need a pan that retains heat exceptionally well. A standard non-stick pan often fails to reach the temperatures required for deep caramelization.
Fine-Mesh Sieve: Essential for rinsing the jasmine rice to remove excess starch, ensuring the foundation of your Korean beef bowls remains light and fluffy rather than gummy.
Microplane Grater: This is the best tool for processing fresh ginger and garlic into a paste, allowing them to meld seamlessly into the glossy glaze.
The Step-by-Step Architecture of the Perfect Bowl
1. Preparing the Steamy Jasmine Rice Foundation
Begin by rinsing 1.5 cups (285g) of jasmine rice under cold water for at least 60 seconds. Combine with 2.25 cups (530ml) of water and a pinch of salt in a pot. Bring to a boil, then reduce to the lowest heat and cover. Let it steam for 15 minutes, then remove from heat (still covered) for another 5 minutes. This creates the “fluffy, steamy” texture seen in the prompt.
2. The High-Heat Beef Sear for Crispy Edges
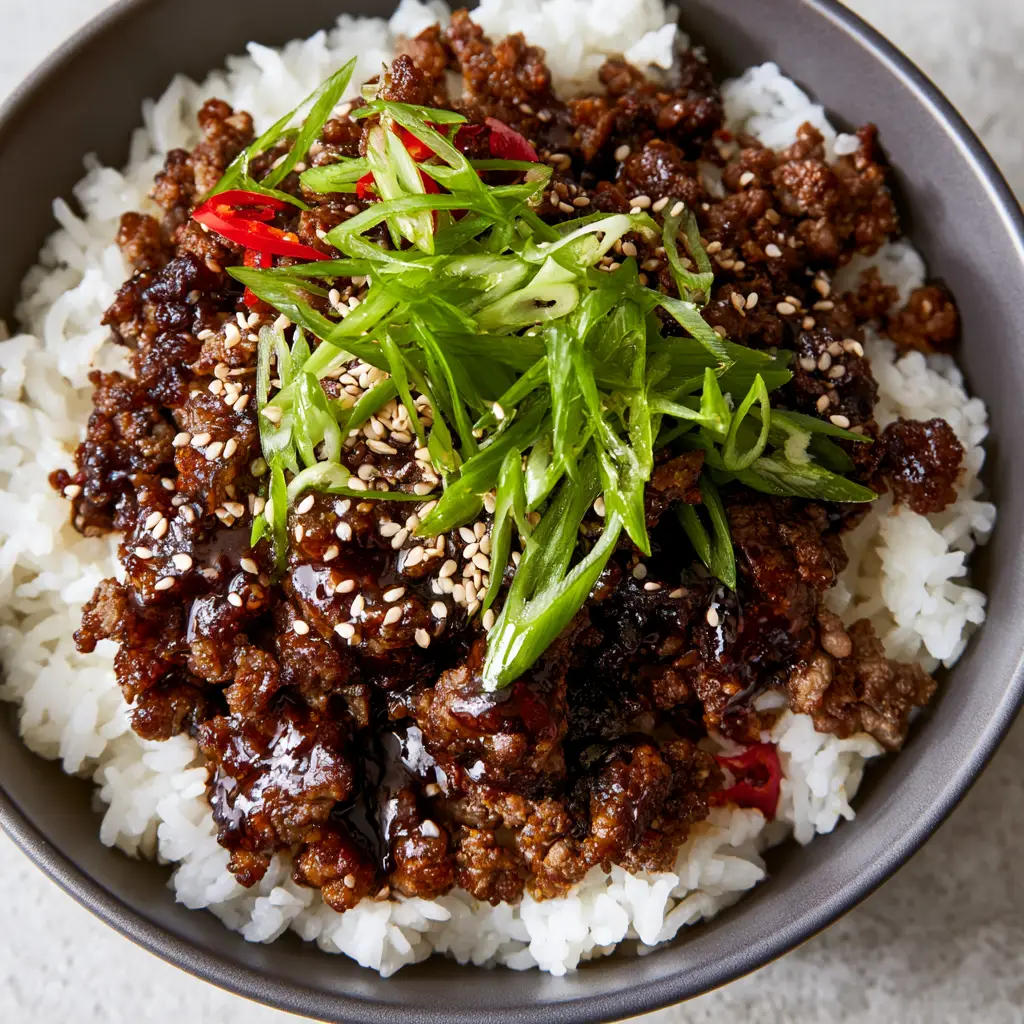
Heat your skillet over medium-high heat with 1 tbsp (15ml) of neutral oil. Once the oil is shimmering (a sensory cue for readiness), add the ground beef. Do not break it up immediately! Let it sit for 2-3 minutes until a deep, dark brown crust forms. This is the secret to the Maillard reaction. Use a spatula to then crumble the beef into small pieces, ensuring those “charred edges” are distributed throughout.
3. Infusing Aromatics and Building the Glaze
Lower the heat slightly and add the minced garlic, grated ginger, and red pepper flakes. Sauté for only 30-45 seconds until you smell the fragrant garlic. If you enjoy this flavor profile, you might also like the aromatics in our balsamic glazed chicken. Pour in the soy sauce and brown sugar. Stir constantly as the sugar melts and begins to bubble. The sauce will reduce into a thick, mahogany-colored glaze that “drenches” the beef.
4. The Final Finishing Touches
Remove the pan from the heat and stir in the toasted sesame oil. This preserves the oil’s delicate flavor. While the beef rests for a minute, prepare your garnishes. Thinly slice the scallions and julienne the red chili into thin curls. If you find yourself with extra ground beef after this meal, consider making our easy ground beef enchiladas later in the week.
Expert Tips for Success
- Don’t Overcrowd the Pan: If your skillet is small, sear the beef in two batches. Overcrowding leads to steaming rather than searing, and you will miss out on those crispy, caramelized edges.
- The “Gloss” Factor: If your glaze isn’t thick enough, let it simmer for an extra 2 minutes. It should coat the back of a spoon and have a reflective, liquid-silk appearance.
- Rice Texture: Never stir the rice while it is cooking. This releases starch and makes it sticky. Use a fork to fluff it only right before serving.
- Chili Curls: To get those “curls,” soak your julienned red chili strips in ice water for 5 minutes. They will naturally twist and become crisp.
Shelf Life and Reheating Instructions
Storage: Store the beef and rice in separate airtight containers in the refrigerator for up to 4 days. Keeping them separate prevents the rice from absorbing all the sauce and becoming mushy.
Reheating: For the best results, reheat the beef in a skillet over medium heat with a splash of water to loosen the glaze. Microwave the rice with a damp paper towel over the top to restore the “steamy” moisture.
Freezing: The cooked beef freezes beautifully for up to 3 months. The rice is best made fresh, but can be frozen if needed.
What to Serve with Korean Beef Bowls
While these Korean beef bowls are a complete meal on their own, they pair beautifully with a crisp, refreshing side. A quick cucumber salad or some pickled radishes provide a bright acidity that cuts through the rich mahogany glaze.
For a complete dinner party experience, serve these alongside a frozen strawberry margarita to balance the heat of the red chili curls. If you are looking for more vegetable-forward sides, our high-protein vegetarian guide has several slaw recipes that complement these flavors perfectly.
Frequently Asked Questions
This recipe has a mild heat from red pepper flakes and fresh chili curls. You can easily adjust the spice level by increasing or decreasing these garnishes.
Absolutely! Store the beef and rice in separate containers for up to 4 days. Reheat the beef in a pan with a splash of water to refresh the glossy sauce.
Yes, but brown rice requires a longer cooking time and more water. Jasmine rice is preferred for its floral aroma and steamy, fluffy texture that complements the glaze.
The gloss comes from the caramelization of the brown sugar. Ensure you simmer the sauce for at least 2-3 minutes until it reduces and thickens into a mahogany-colored glaze.
An 85/15 or 90/10 lean ground beef is ideal. The fat is necessary to achieve the ‘charred edges’ without the meat becoming dry and tough.
The Ultimate Korean Beef Bowl Recipe
Korean beef bowls with Crispy Ginger-Soy Glaze and Fluffy Jasmine Rice
Ingredients
Equipment
Method
- Rinse the jasmine rice until water runs clear. Combine with 2.25 cups water and bring to a boil.
- Cover and simmer on low for 15 minutes. Remove from heat and let sit covered for 5 minutes before fluffing.
- Heat oil in a skillet over medium-high. Add beef in a flat layer and sear for 3 minutes without moving to create charred edges.
- Crumble the beef, add ginger and garlic, and cook for 1 minute. Pour in soy sauce and brown sugar. Simmer until the sauce becomes a thick, glossy mahogany glaze.
- Stir in sesame oil. Spoon beef over rice and top with sesame seeds, scallions, and chili curls.
Notes
Soak chili slices in ice water for 5 minutes to get the perfect curl.
Closing & Call to Action
These Korean beef bowls are a testament to how simple ingredients, when treated with the right culinary techniques, can create a meal that is both visually stunning and deeply satisfying. From the first scent of ginger to the final crunch of a charred beef edge, this is a dish you will return to again and again.
If you made this recipe, I would love to see your results! Leave a comment below or tag me in your photos. Don’t forget to follow me on Pinterest for more weeknight dinner inspiration and visual recipe guides.